by Carmel Schvartzman
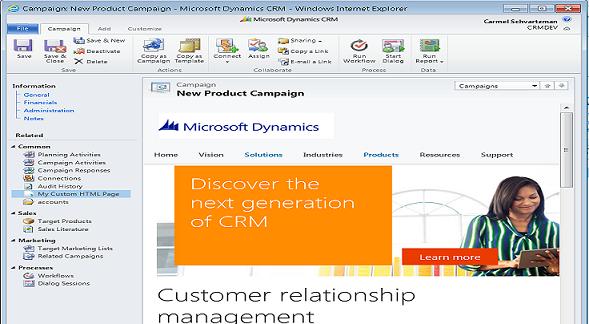
- In this walkthrough we will learn how to create a Ribbon Button in CRM 2011. We'll be adding a custom button called "Custom action" to the "Collaborate" group of the Case ribbon. By pressing that button, an action coded in javascript will fire. The javascript code will reside in a Web Resource. A Web Resource is a virtual html, jscript, css, picture or Silverligth file stored in the CRM database, and identified by a unique URL. After its creation, a Web Resource can be used in several CRM Forms, enhancing its functionality and/or appeareance. The custom ribbon button will appear as follows:
How to create a Ribbon Button in CRM 2011
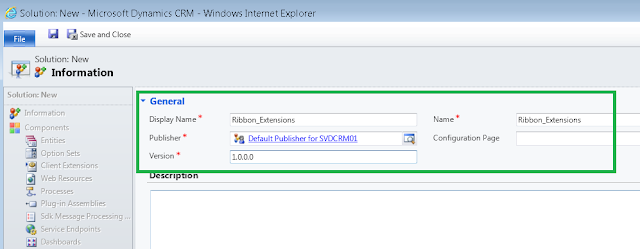
- We'll add a button to the ribbon by modifying the XML that defines its structure. In order to do that, we need to get that XML, exporting a solution wich contains the entity form we want to customize. Let's create that solution: press "New" at Solutions:

- Next, give it a relevant name, and fill the required fields:
- Then, Add to the solution the Case by clicking "Add Existing...Entity":
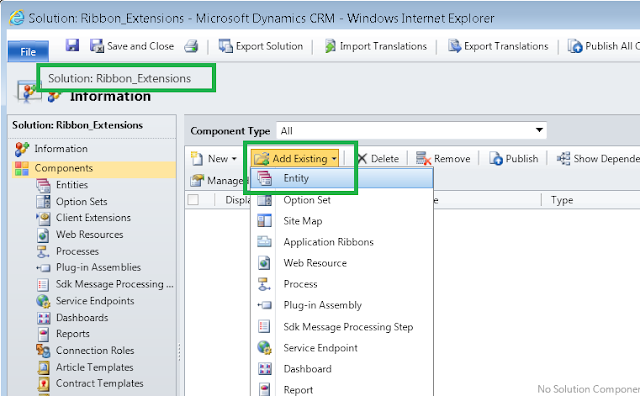
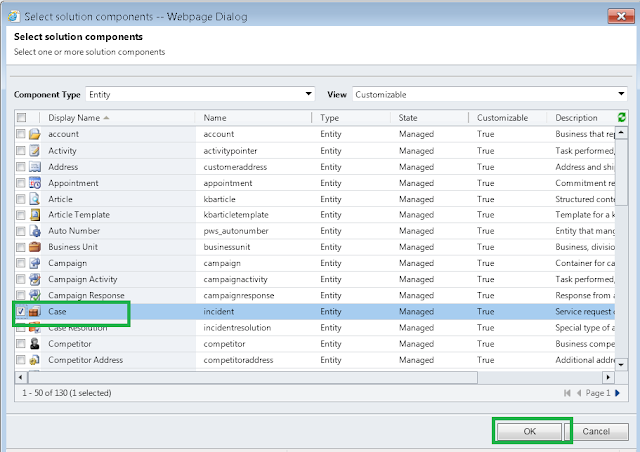
- Add to the Solution the Case entity:
- Publish the Solution and click on "Export Solution":
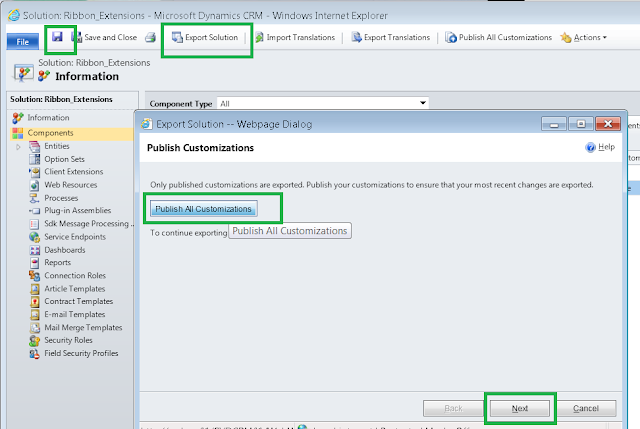
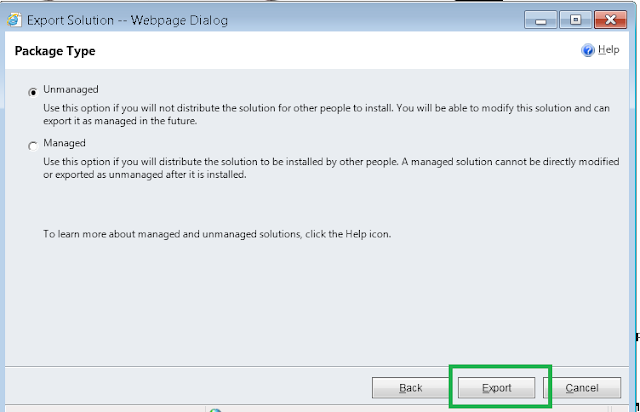
- Click "Next" and go to the next dialog:
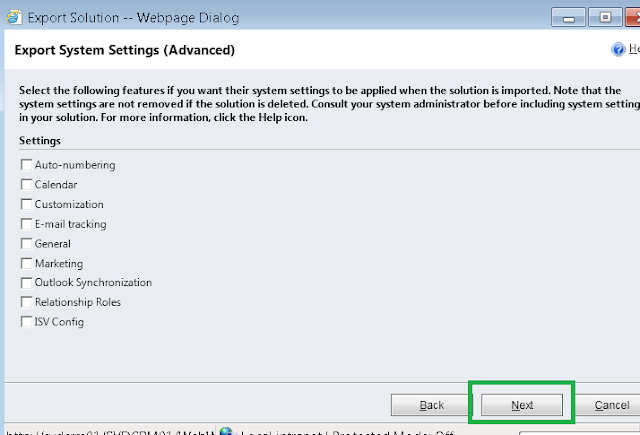
- Select "Unmanaged" because we don't want to distribute this solution to other people, and Export it:
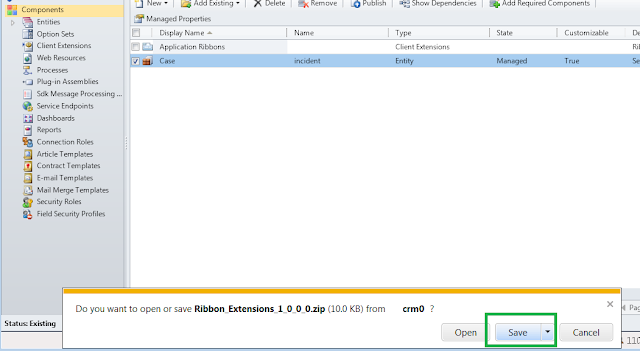
- Save the ZIP file to some address in your machine:
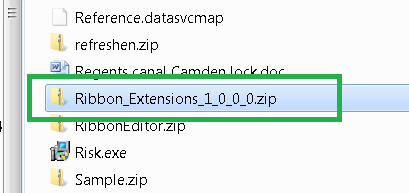
- Find the ZIP file and open it:
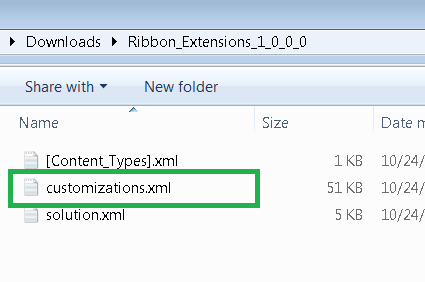
- From the unzipped folder, we only need to modify the "customizations.xml" file, so make a backup of it, and open the xml in any text editor you like, like Notepad++:
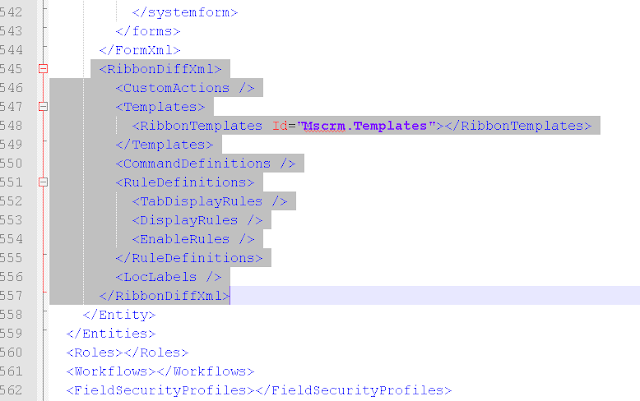
- Make a search on it to find the "RibbonDiffXml" element:
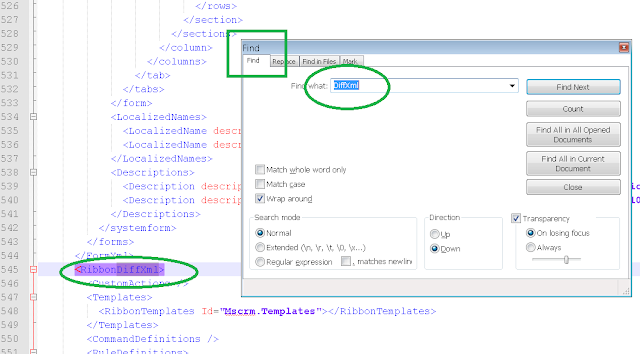
- Take a close look to it: this element is just a skeleton to create a custom button:
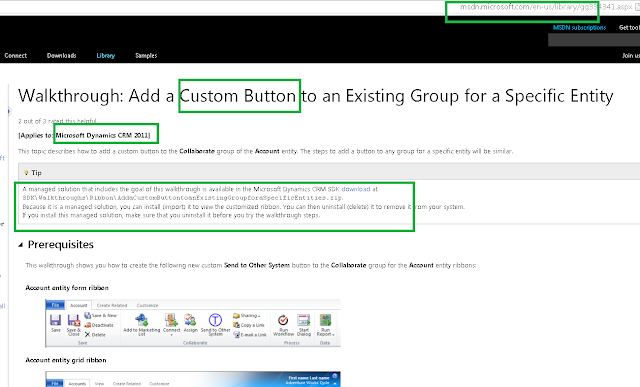
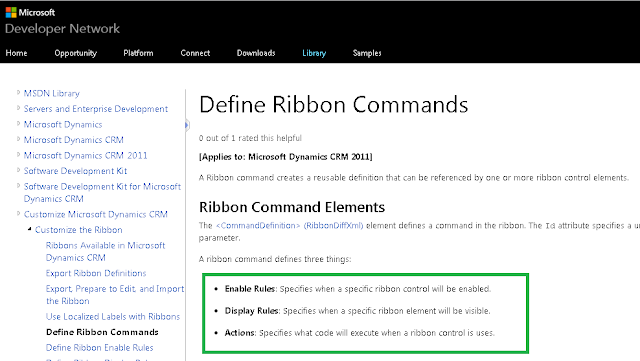
- Now let's take a look to the DYNAMICS CRM documentation at MSDN:
- In the XML we define the display rules that will guide the action performed by the custom ribbon button we are designing. There is a sample that sets a "DISPLAY RULE" only in case of an entity "Create" action: ( the "display" rules documentation is here )
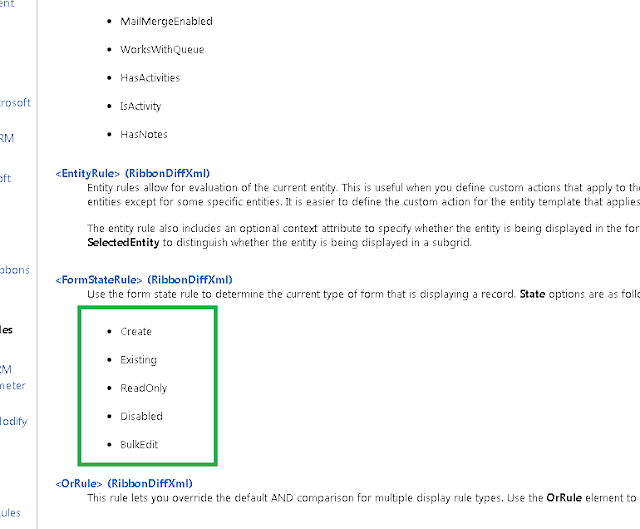
- There are several rules for the entity state. We need to select the "Existing" option, because we want to apply this button to existing entities:
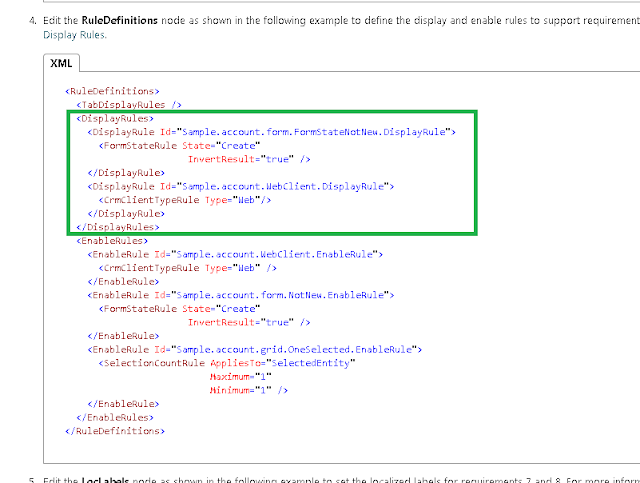
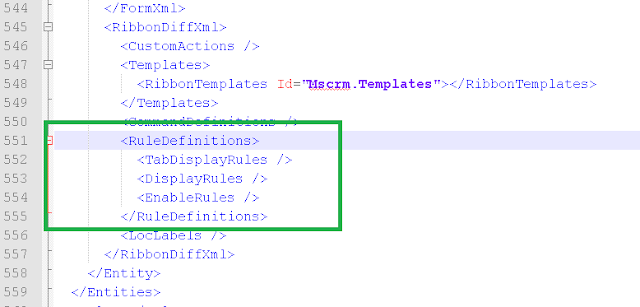
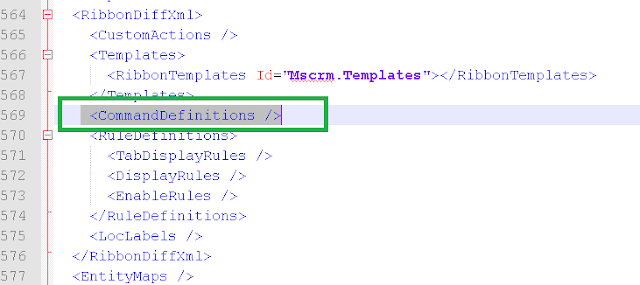
- Find the "RULE DEFINITIONS" element: we'll modify it: ( the "enable" rules documentation is here ))
- Therefore, modify the "RULE DEFINITIONS" element as follows:
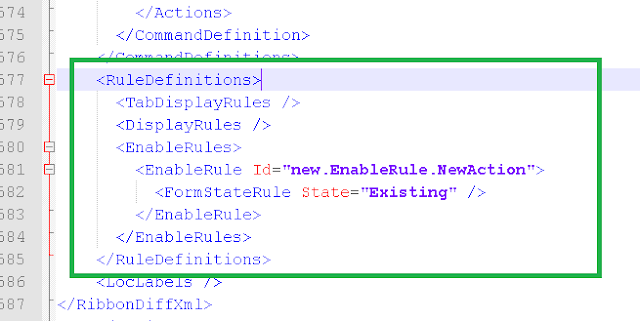
This is the code to type:
<RuleDefinitions>
<TabDisplayRules />
<DisplayRules />
<EnableRules>
<EnableRule Id="new.EnableRule.NewAction">
<FormStateRule State="Existing" />
</EnableRule>
</EnableRules>
</RuleDefinitions>
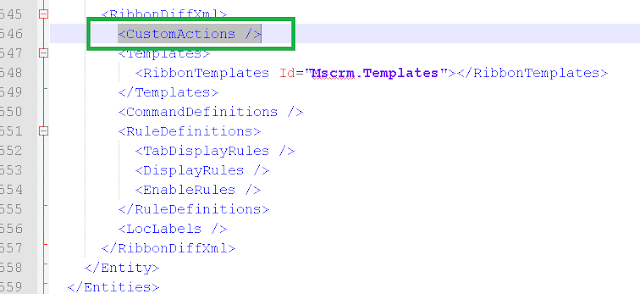
- Now, we'll define the ACTION performed by the custom button, so find the "CUSTOM ACTIONS" section:
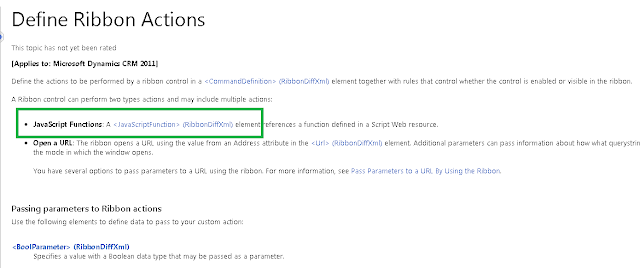
- Again at the CRM documentation, examine the Ribbon Commands elements: ( the "commands" documentation is here )
- You'll find out that we can attach a javascript function to a custom ribbon button in CRM 2011: ( the "actions" documentation is here ) :
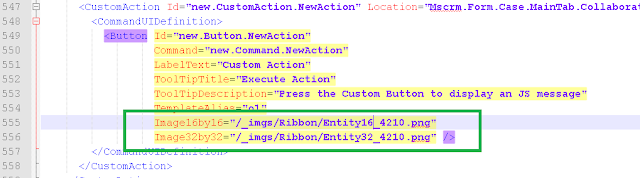
- According to the documentation, modify the "CUSTOM ACTION" element as follows:
<CustomAction Id="new.CustomAction.NewAction" Location="Mscrm.Form.incident.MainTab.Collaborate.Controls._children" Sequence="27">

Be careful to change the entity logic name to the entity you are intending to customize. In this example, the entity is "Case" and its logical name is "incident". Change it to adapt to your needs. Also, change the "Collaborate" ribbon group to the one you want to add your button to. The "Sequence" is the place inside the ribbon group in wich your button will be displayed, so choose any number greater to the number of buttons in it.
- Type some relevant text for the button LABEL and for the TOOLTIP you want to be displayed:
<CommandUIDefinition>
<Button Id="new.Button.NewAction"
Command="new.Command.NewAction"
LabelText="Custom Action"
ToolTipTitle="Execute Action"
ToolTipDescription="Press the Custom Button to display an JS message"
TemplateAlias="o1"
Image16by16="/_imgs/Ribbon/Entity16_4210.png"
Image32by32="/_imgs/Ribbon/Entity32_4210.png" />
</CommandUIDefinition>

- Now, for the picture in the button, i'll be using a CRM picture, stored in the CRM 2011 site, in the "_imgs" folder:
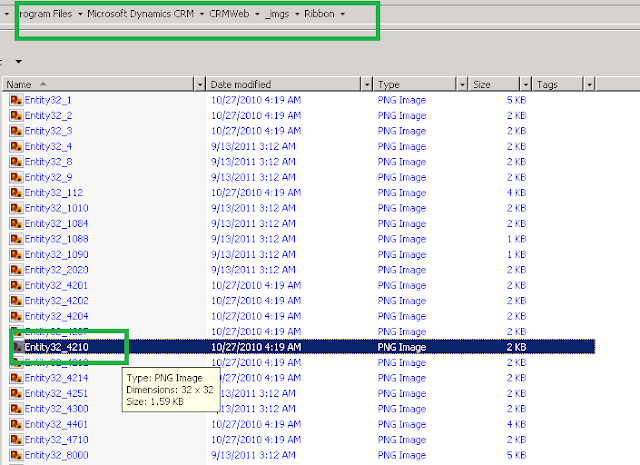
- Add the selected pictures to both 16 pixels and 32 pixels fields:
- Now, for the linking between the button and the javascript function, we'll need to customize the "COMMAND DEFINITIONS" element, so find it:
- Type the following code , and take a look at the relation between the button and the command definition:
<CommandDefinitions>
<CommandDefinition Id="new.Command.NewAction">
<EnableRules>
<EnableRule Id="new.EnableRule.NewAction" />
</EnableRules>
<DisplayRules>
<DisplayRule Id="Mscrm.CanWritePrimary"/>
</DisplayRules>
<Actions>
<JavaScriptFunction Library="$webresource:new_ribbonbuttonjs" FunctionName="DisplayMsg">
</JavaScriptFunction>
</Actions>
</CommandDefinition>
</CommandDefinitions>
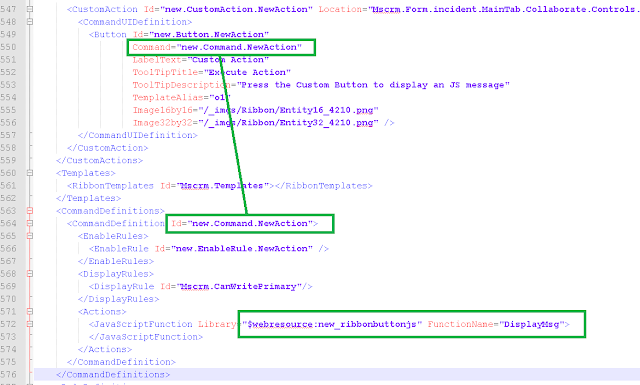
As you can see, we'll be using a Web Resource called "new_ribbonbuttonjs", which includes a javascript function "DisplayMsg". We'll build such Web Resource later in this tutorial.
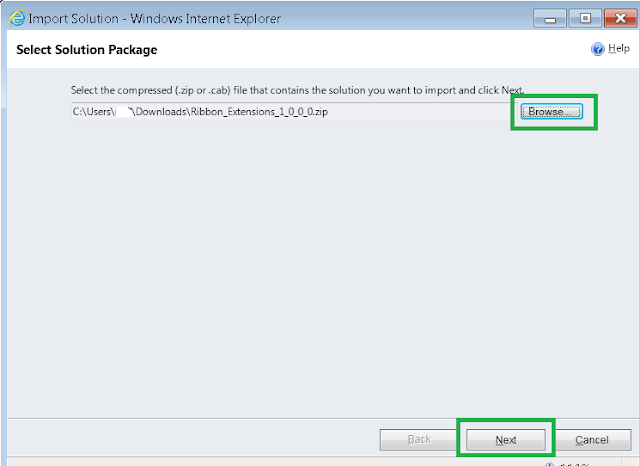
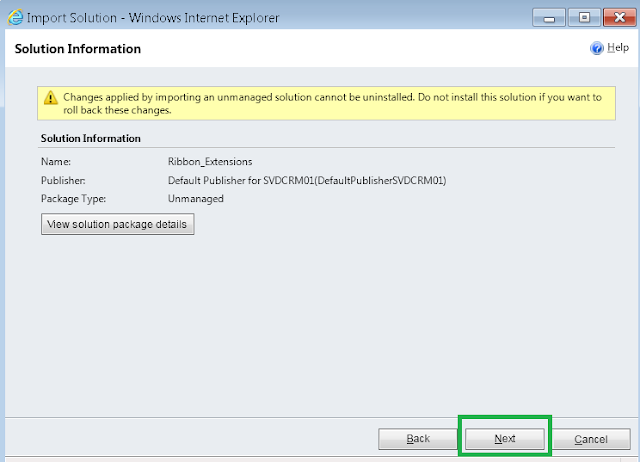
- Now let's import back our XML , with the modified ribbon. ZIP the 3 files and ...
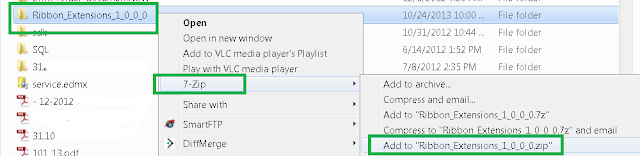
- ... import them back to CRM 2011:

- First browse to the ZIP file folder:
- Ignore the warning you'll get :
- Import the XML ribbon customizations:
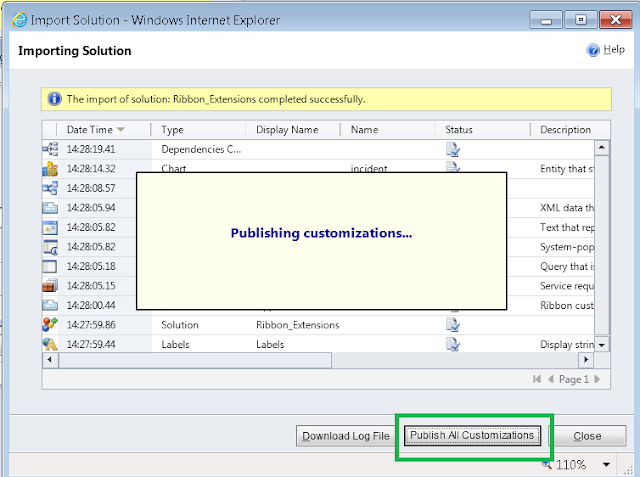
- And don't forget to publish the changes:
- If you get a FAIL message, check the details for the cause of them:
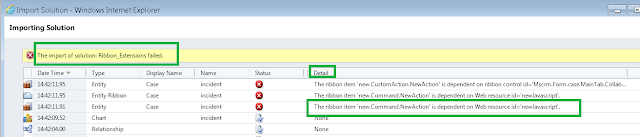
For instance, in this case CRM didn't find the Web Resource required
- Therefore, let's create that Web Resource. Go to New Web Resource, and give it exactly the same name you set at the XML file:
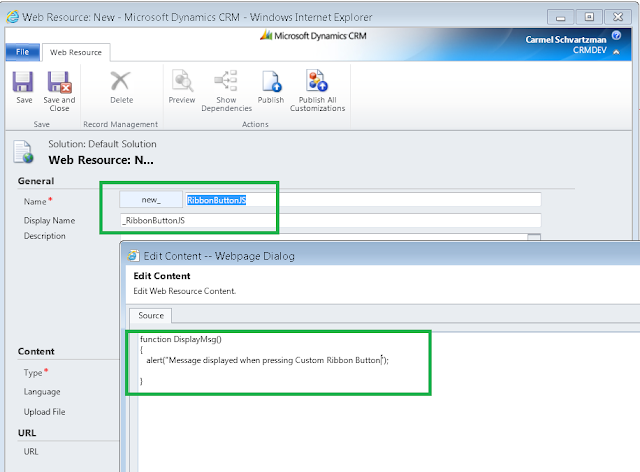
Our javascript function will just open an alert window to display a message. Type the function inside the Text Editor of the Web Resource.
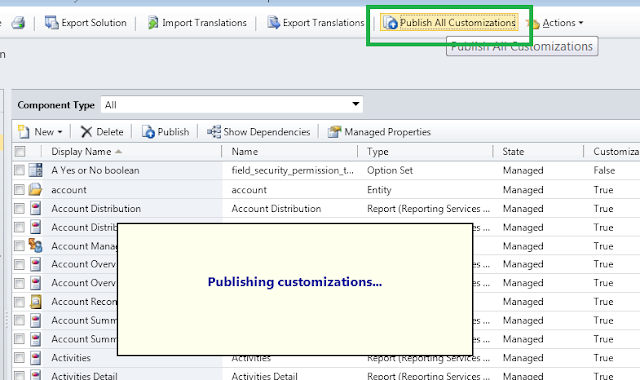
- Publish the Web Resource:
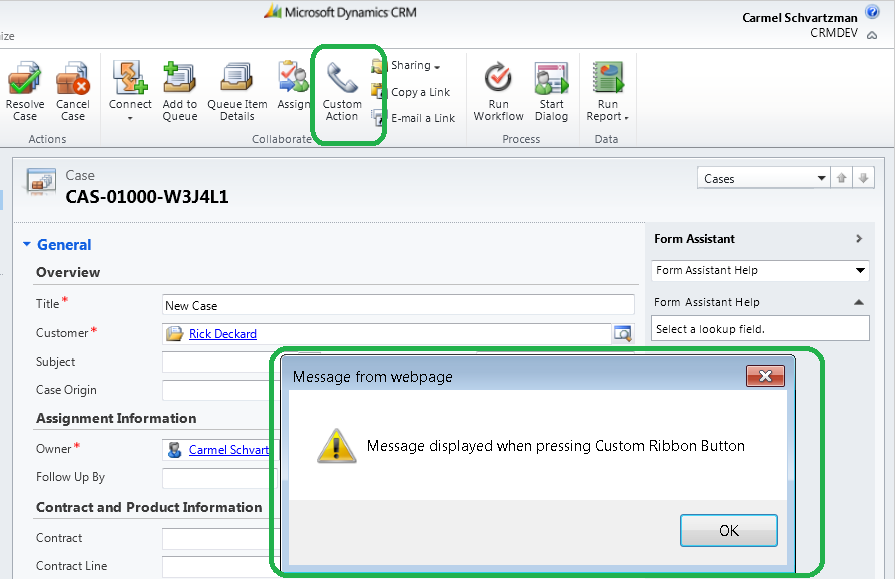
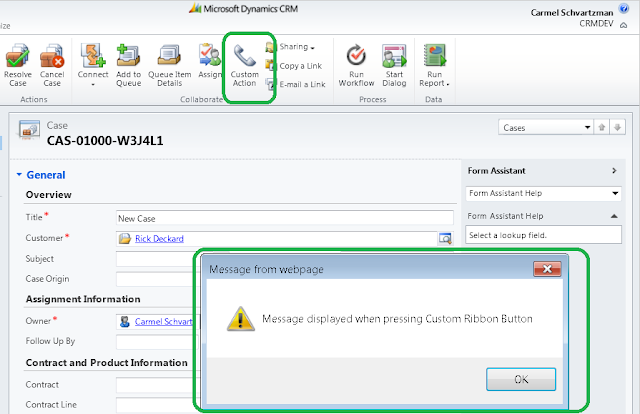
- Finally, open some Case form entity. You'll be acknowledge with our brand new ribbon button:
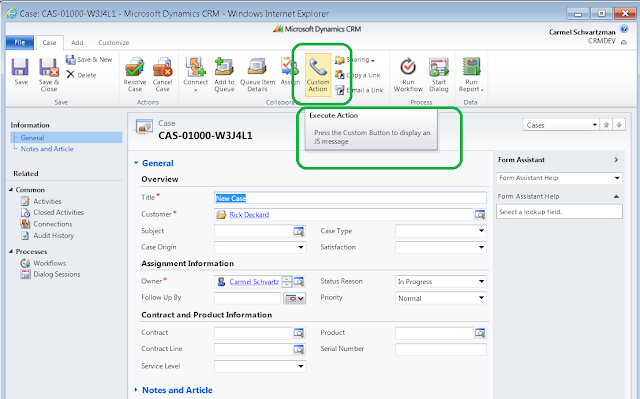
Also you'll see the tooltip of the custom control.
- And pressing our custom button fires the javascript code we just created:
- In this tutorial we saw How to create a Ribbon Button in CRM 2011. That's all...Enjoy Dynamics CRM !!!
כתב: כרמל שוורצמן
by Carmel Schvartzman
- In this walkthrough we will learn how to open a Dialog automatically from Client Side, using Javascript and a Web Resource, in Dynamics CRM 2011. A Web Resource is just a virtual file containing html, jscript, css, a picture or Silverlight , stored in the CRM database, and identified by a unique URL. After its creation, a Web Resource can be used in several CRM Forms, enhancing its functionality and appeareance. In our example, we will use a javascript Web Resource to launch a Dialog when an CRM Form opens:

- First, we'll need a javascript code inside a Web Resource. Open the Web Resources:

- ... and create a New Web Resource:

- Give it a Display Name with a "_" to make the Web Resource appear at the top of the Web Resources list, and set the Type to script:

- Open the Text Editor and type the javascript function that will open the Dialog:

The first parameter represents the CRM context, and the second will be the ID of the CRM Dialog we want to launch from the form.
- Let's stop the creation of the Web Resource for now, and go to the form of the entity you want to open the dialog from:

- To relate our Web Resource to the form, open the Form Properties:

- Add the Web Resource to the Form Libraries:

- Find and open the Web Resource we just created:

- Next, add it as the Event Handler script that will run on a "OnLoad" event:

- The next step is to set what will be the function that will be called. Be careful to type exactly the same name you saved when you created the Web Resource:

Also, pass the execution context as the function's first parameter.
- Now we have a little problem: the second parameter must be the ID of the Dialog we want to open. Where we can obtain the GUID of the Dialog? Well, that's a bit tricky. Go to the Dialog you want to launch:

- Open it, and click "Copy a Link" from the Actions menu:

That will copy to the clipboard a URL containing the GUID of the Dialog.
- Go back to the Event Handler , and paste it to the parameters text box:

- You can see a URL and an "ID" in it: this is the GUID of the Dialog:

- So erase everything else , and close the GUID with quotes:

- Save the form and Publish it. Now we have the parameters we need . Get back to the Web Resource, and type the following code to get the Organization's server URL:

- Next, we need to determine the Entity Name and the ID of the Record represented by the CRM Form, so type the following code:

- Now we build the URL of the window that will open the dialog. Start with the server:

- ... and link the Entity Name and ID to the URL:

- Finally , type the javascript code that opens the window dialog:

- And we're done... Let's see how it works: open some Contact:

- ... And you'll see that the selected CRM 2011 Dialog launchs automatically when the Form opens:

That's all...Enjoy Dynamics CRM!!!
כתב: כרמל שוורצמן