- In this walkthrough we will learn Step-By-Step how to create a Workflow in Dynamics CRM 2011/2013, to send a Letter to some Entity. A Workflow is a custom process that run in the application background and whose aim is to automatize business tasks , and is built on steps. After creation, a Workflow can be triggered by entities creation, assignment or deletion, by changes on the entity, and even can be called on demand. For Example, we can use a Workflow to make a Letter each time some new Account is created:

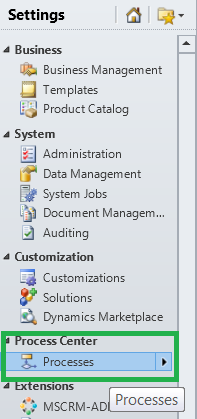
- In order to create a new Workflow, go to Customize the System, and then to Processes:
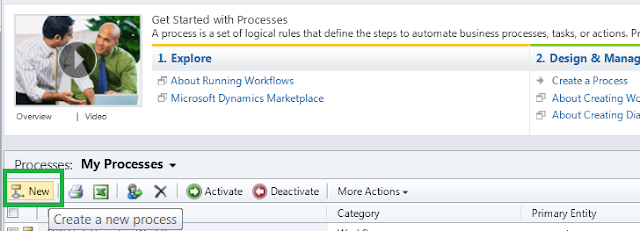
- Click on New:
- Type a relevant Process Name and select the Entity you want the Workflow apply to:
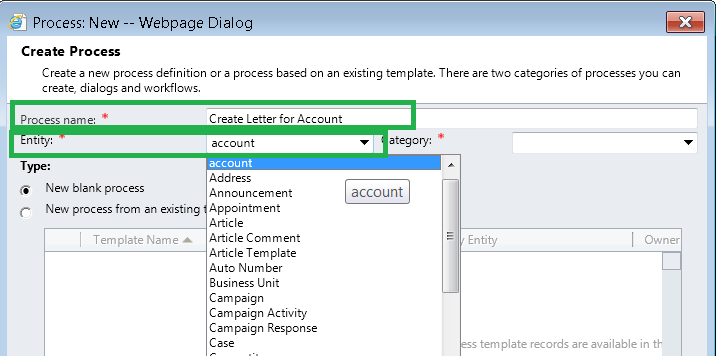
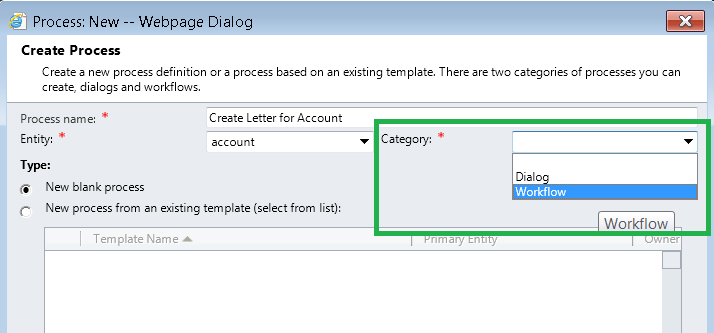
In our case, the Entity is Account. - Select the Workflow category:
- Next state that the workflow will be run both when a new rescord (Account) is created, or when is demanded to run:
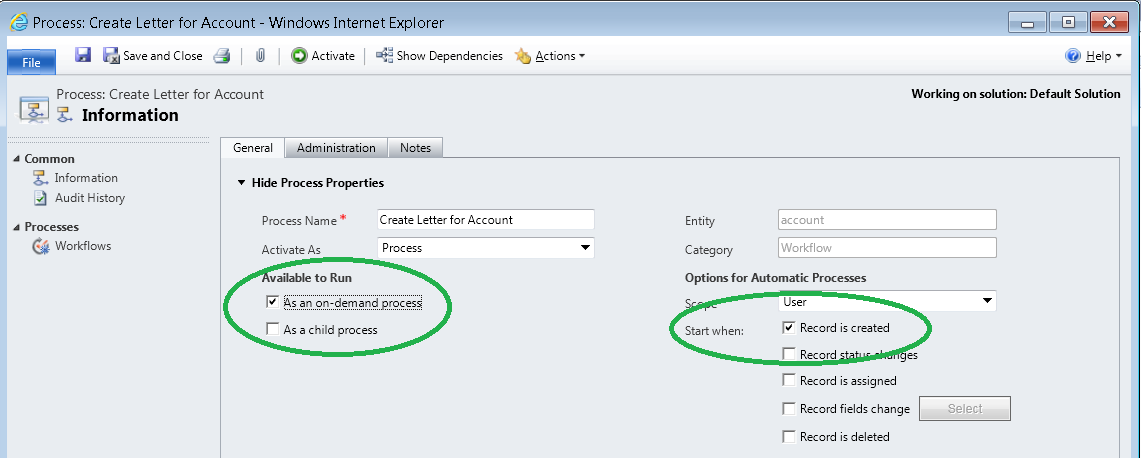
Notice that you can choose also to run the Workflow when the record is deleted, reassigned, when its status changes , or when some field is updated. - Now we can add steps to the workflow. To create a Letter when an Account is created, let's select "Create Record":
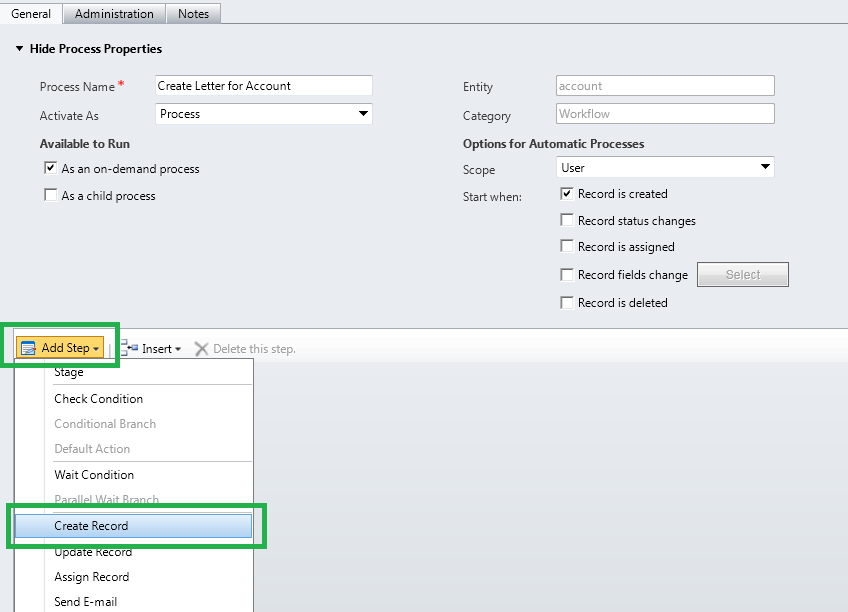
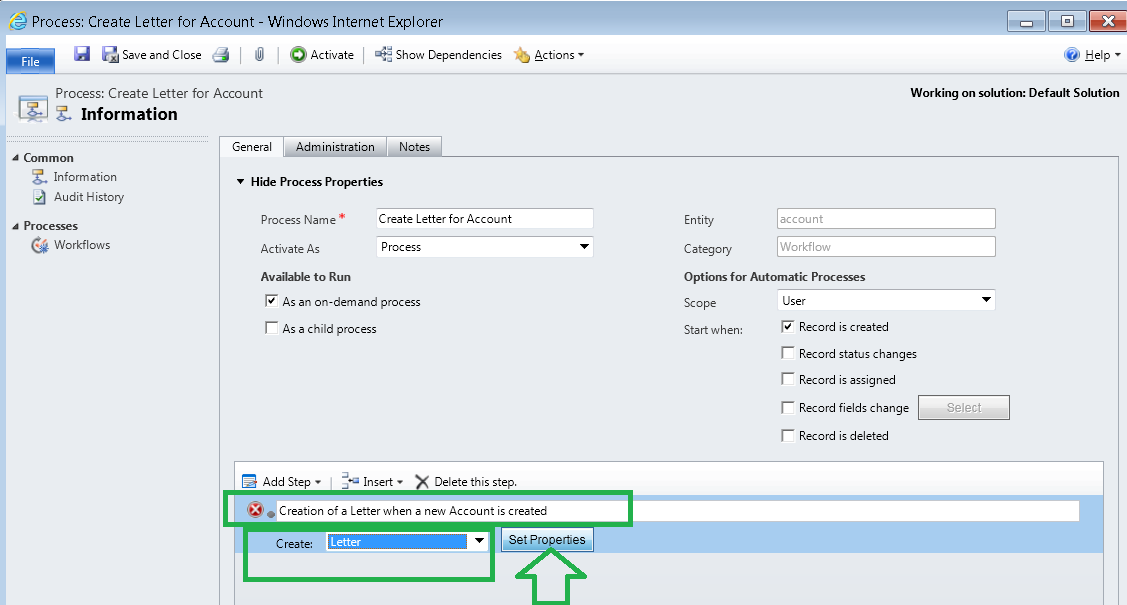
- Type a description of the Step, and go to "Set Properties" in order to design the Letter:
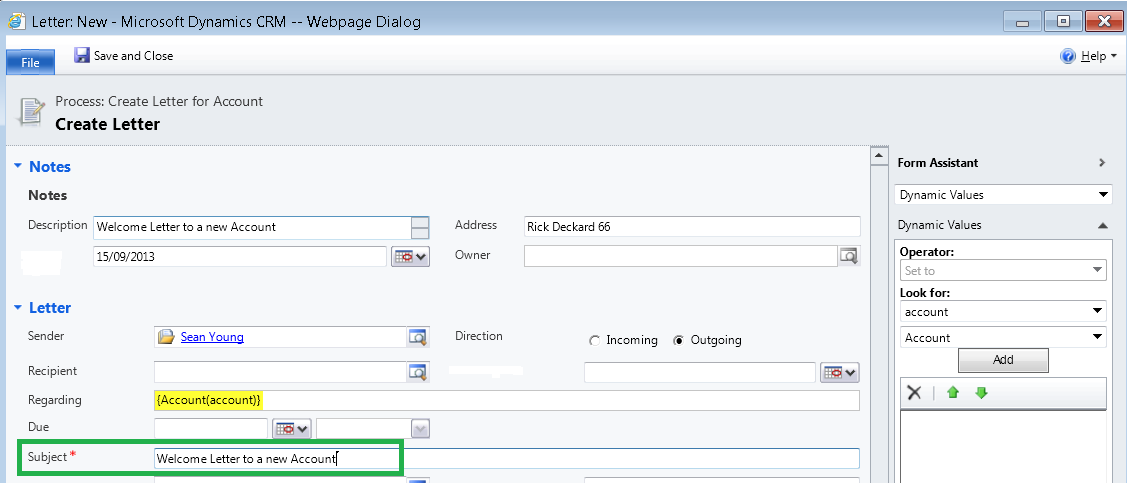
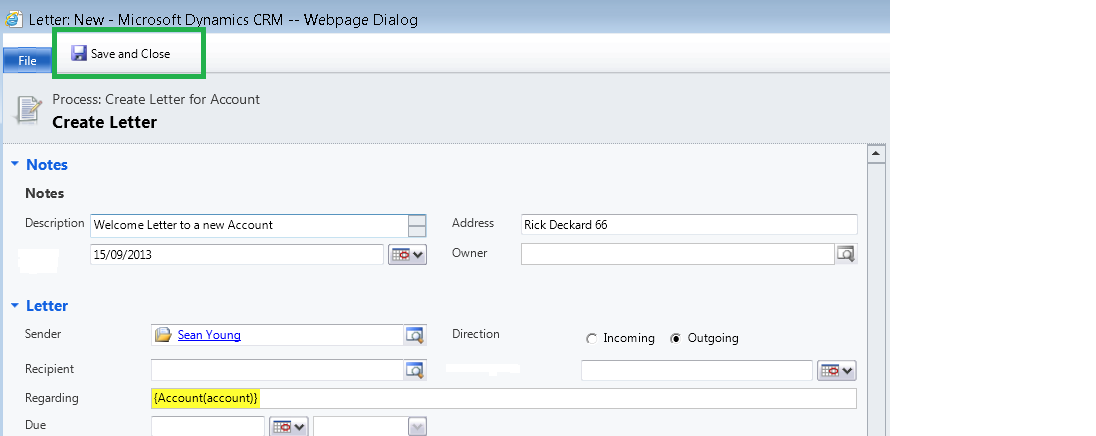
- Here you can design what you want the Letter to be, for example, let's type a Subject and select the Sender of the Letter, add also some Description and the Date:
- Whn you are done, Save and Close the dialog:
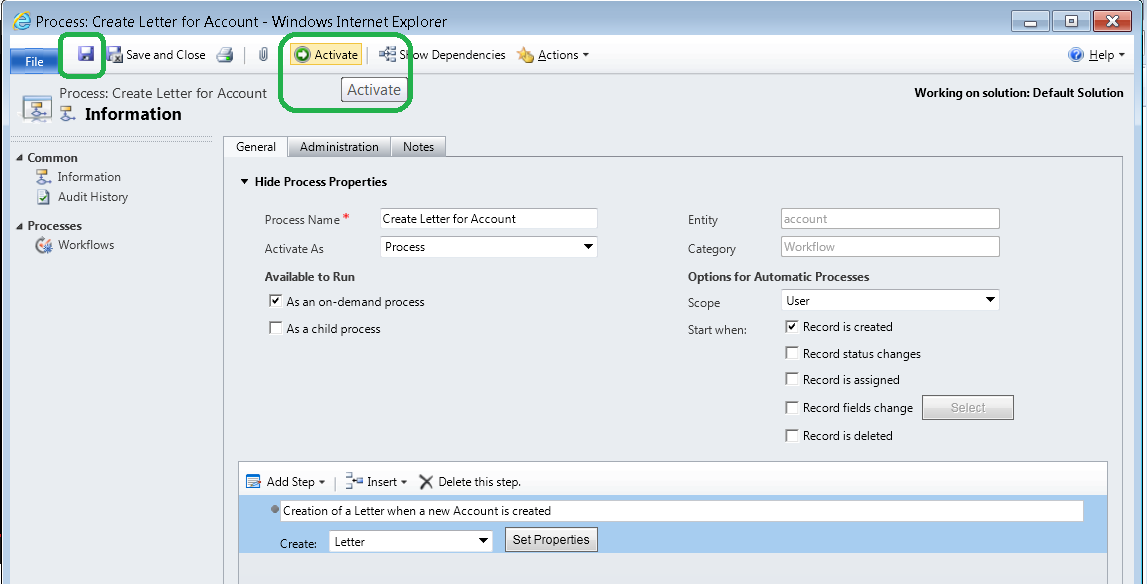
- Finally, activate the Workflow:
- Now let's create a new Account to see how it works:
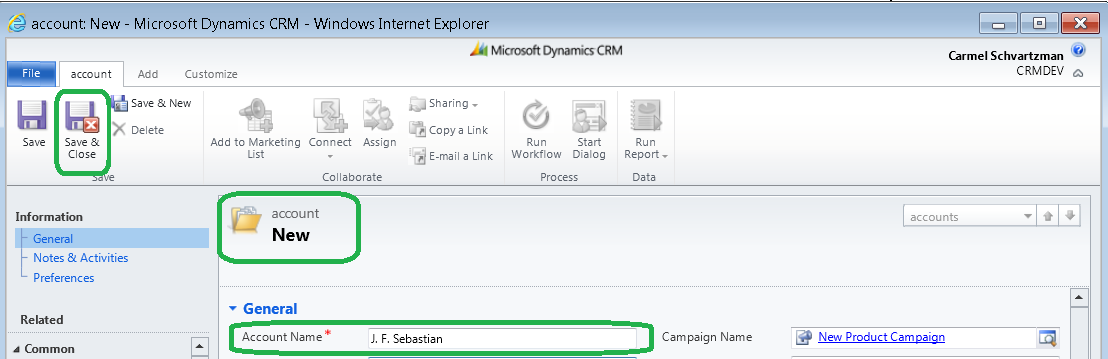
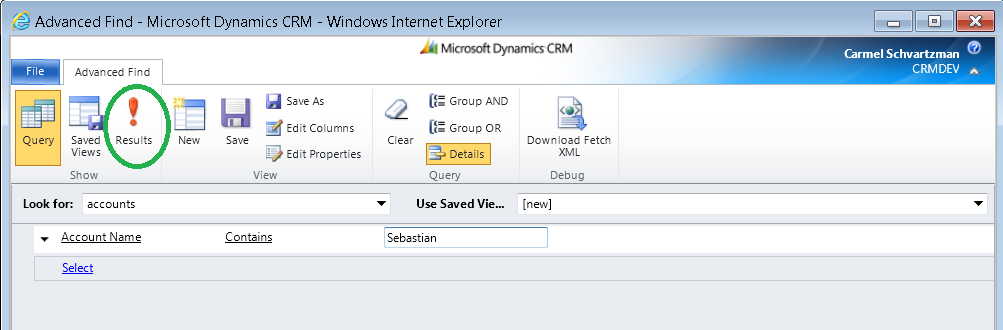
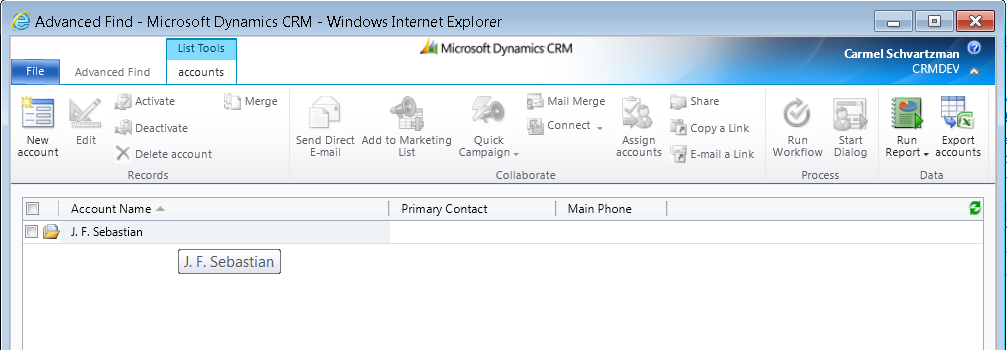
After entering some data, Save and Close the new Account form. - Now on the Accounts list, search for the Account we just created, to see the Letter attached to it. Go to Advanced Search, and set the following search: " ACCOUNT NAME - CONTAINS - SEBASTIAN ": (click on Results to see the required record)
- We have found the new Account created:
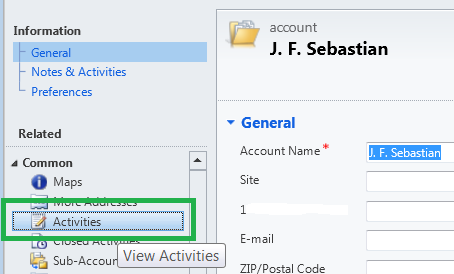
- Open the Account and then go to the Activities:
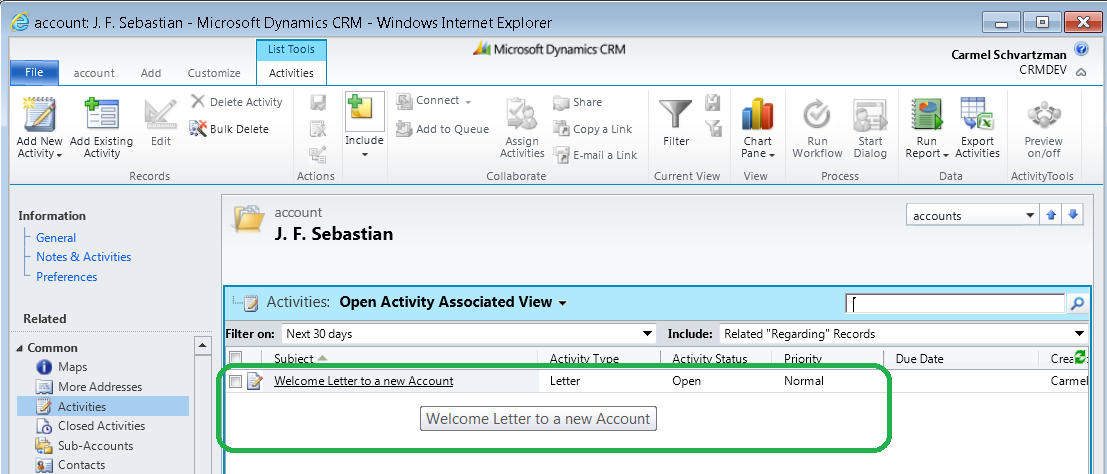
- There you will see the Letter that the Workflow created automatically:
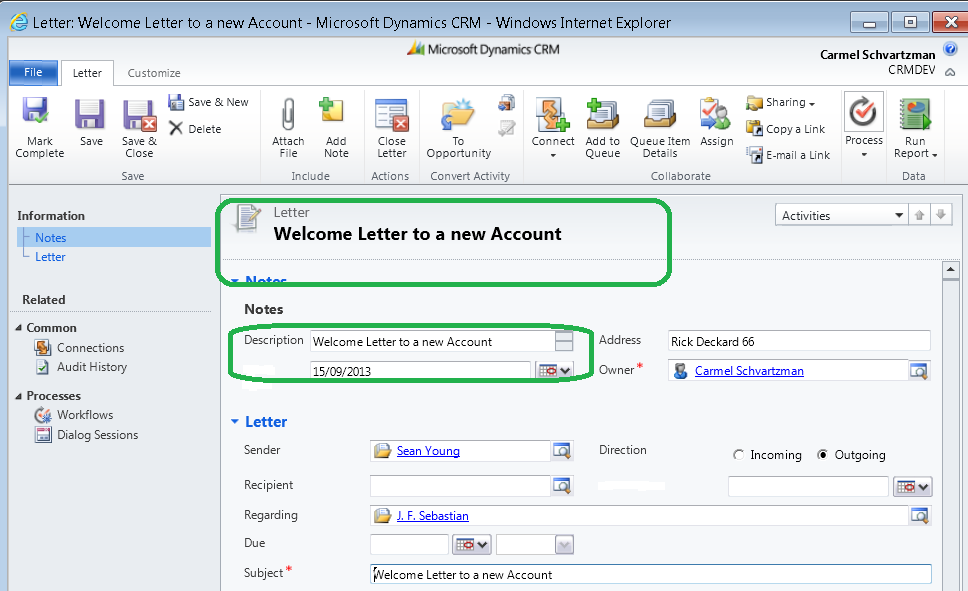
- Open the Letter and take a look at the data in it:
That's all...Enjoy Dynamics CRM !!!כתב: כרמל שוורצמן
Microsoft Dynamics CRM 2011
Tuesday, September 17, 2013
How to create a Dynamics CRM Workflow to send Letters
by Carmel Schvartzman

Subscribe to:
Post Comments (Atom)
No comments:
Post a Comment